As a Buddy or Goals Admin, you can create Goals on behalf of a Supported User.
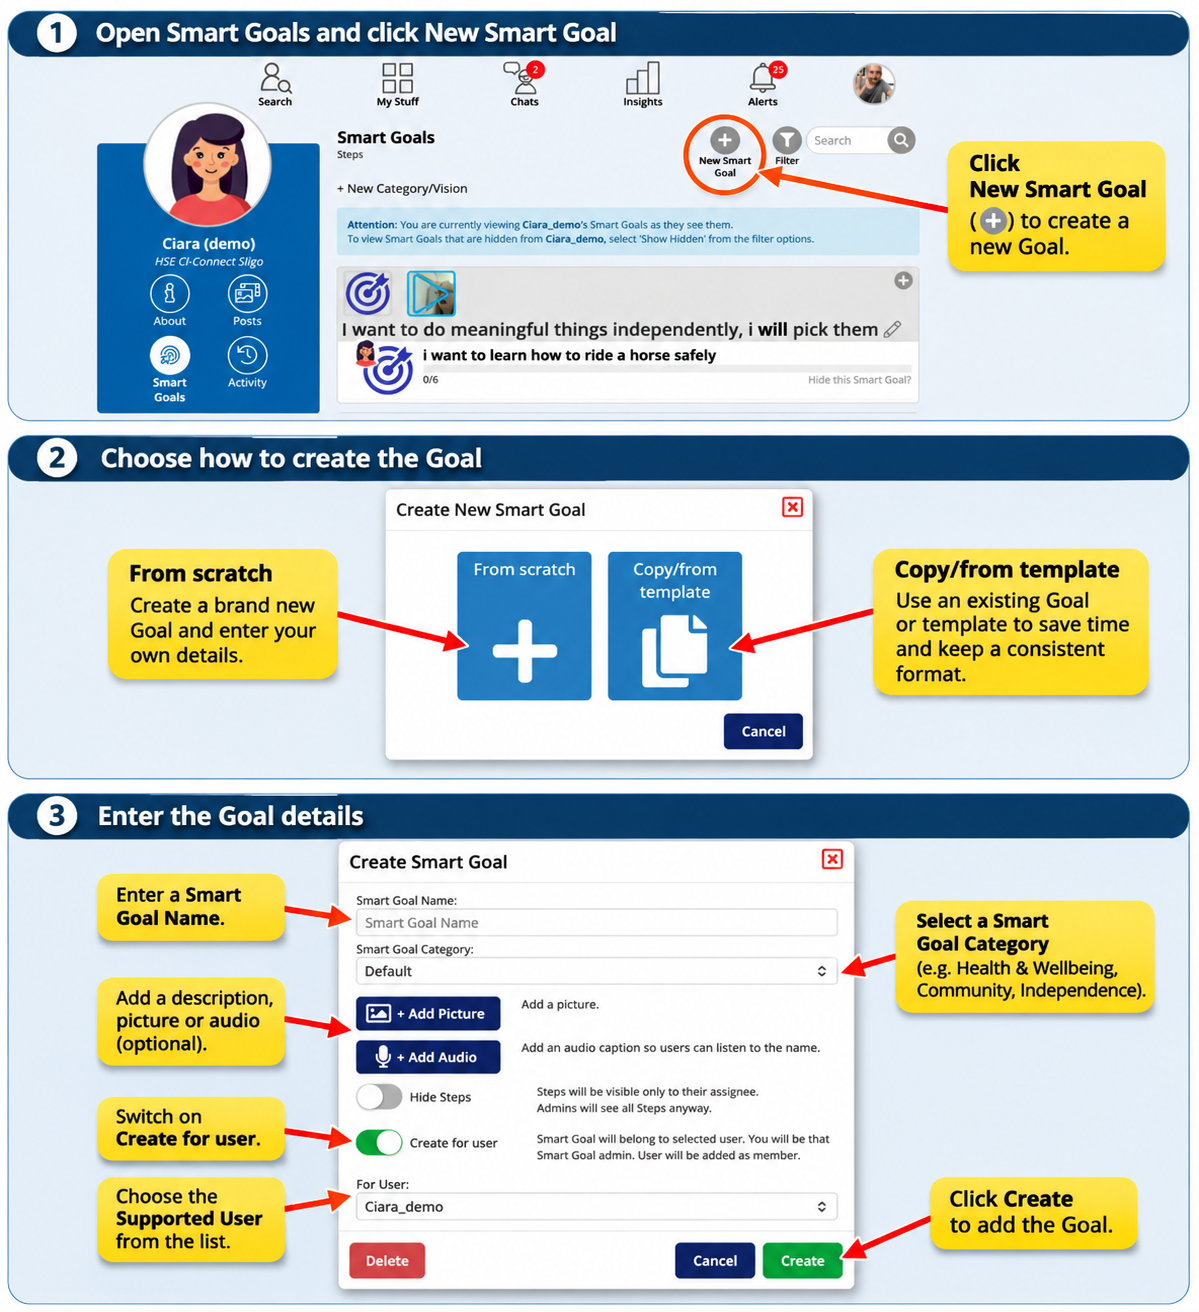
1. Open the Supported User's Goals
You can do this from:
My Stuff → My Goals, then select the Supported User's Goals.
The Supported User's Profile Page → Goals in their Quickmenu.
2. Create a new Goal
Click New Goal (+).
Choose From scratch to create a new Goal, or Copy/from template to use an existing Goal or template.
3. Enter the Goal details
If creating a Goal from scratch:
Enter the Goal Name.
Select a Goal Category.
Add a description, picture or audio caption if required.
Choose whether to Hide Steps from other members. Admins can still see all Steps.
Switch on Create for user.
Select the Supported User from the For User dropdown.
Click Create.
The Goal will belong to the selected Supported User, and you will be added as its Admin.
4. Add Steps to the Goal
Once created, open the Goal and add Steps to help the Supported User work towards achieving it.
Diary entries can also be linked to individual Goal Steps as evidence of activities, achievements and progress.
Tip: Adding pictures and audio can help make Goals more accessible and meaningful to the person they belong to.
Was this article helpful?
That’s Great!
Thank you for your feedback
Sorry! We couldn't be helpful
Thank you for your feedback
Feedback sent
We appreciate your effort and will try to fix the article