RBA Tables connect Supported Users with the people who need access to their information and the roles those people have.
When you first create a table, Multi Me asks you to start with one Supported User and one RBA User. Once the table has been created, you can edit it to add as many additional Supported Users and RBA Users as you need.
Create your RBA Table
Go to the Portal Admin area.
Select Manage User Roles from the navigation at the top of Portal Admin.
Select RBA Tables.
Click Add Table and give your table a name. The name can be changed later. Click Next.
Select JUST ONE Supported User to start the table.
Don't worry — once the table has been created, you can add more Supported Users. We just need one to create the initial table.
Click Next.
Select JUST ONE RBA User.
Again, you'll be able to add more RBA Users once the table has been created.
Click Next.
Use the dropdown menu to select the Role you want to give this RBA User.
The role can be changed later if required.
Click Create.
That's it! Your new RBA Table has been created.
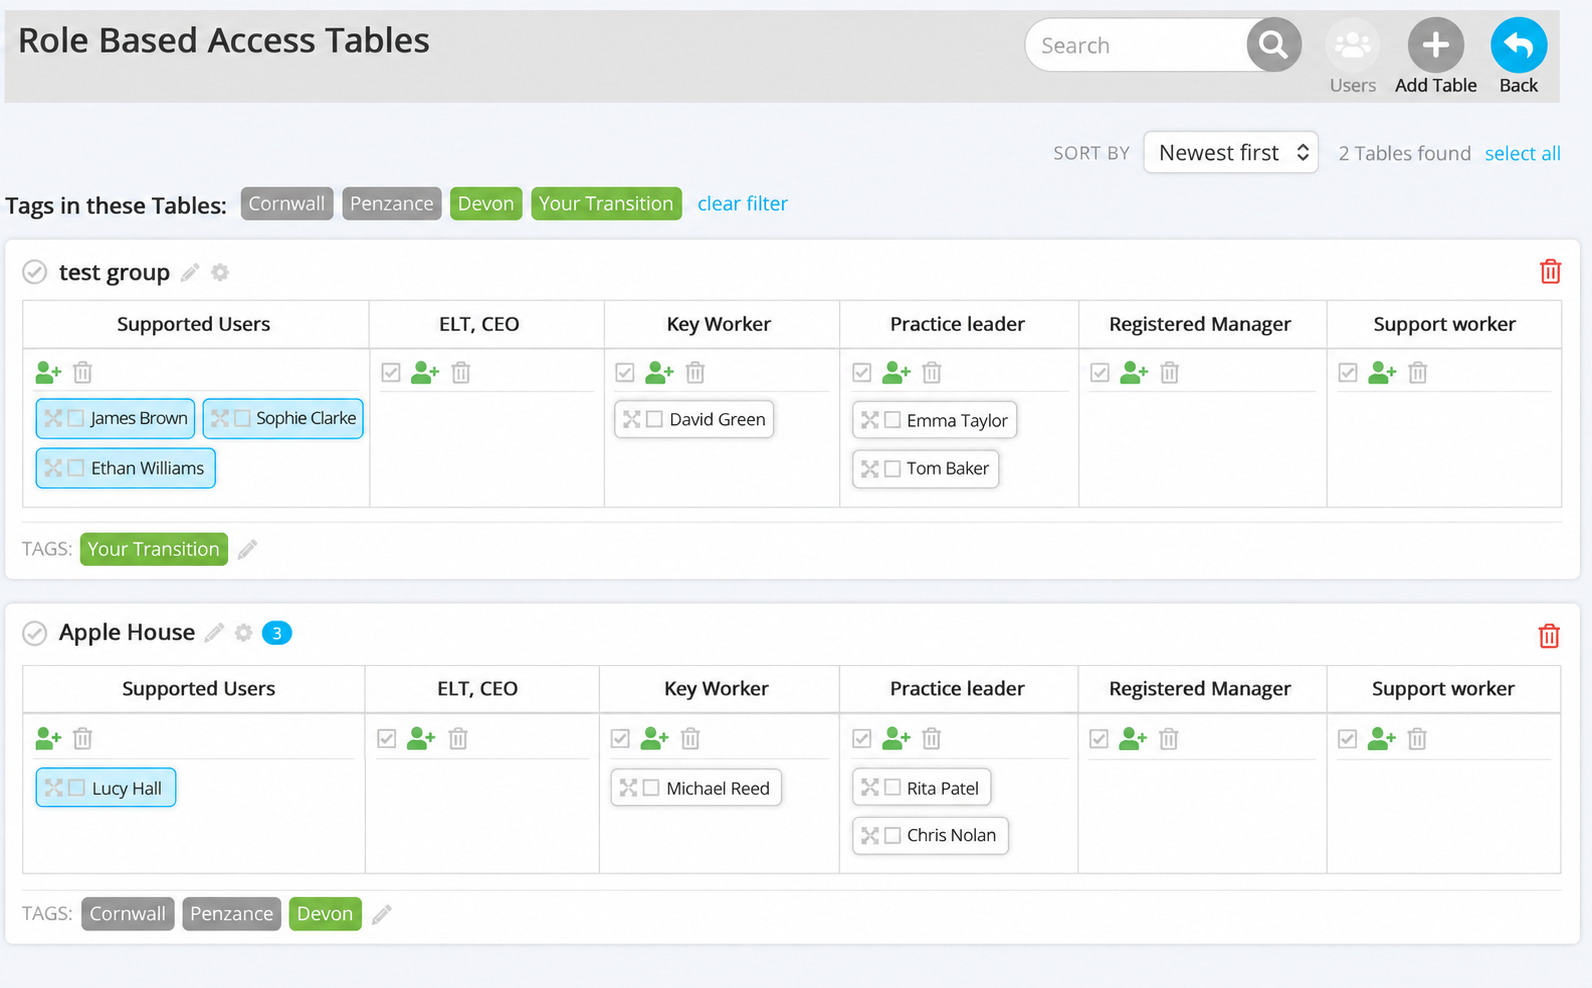
The table will now appear on the RBA Tables page. Supported Users and RBA Users will be displayed in their relevant columns, with RBA Users organised according to their assigned roles.
Tagging your Tables
You can add Tags to RBA Tables to make them easier to find, filter and organise.
For example, if you operate supported living services across Cornwall, you might use location Tags such as:
Cornwall · Penzance · Falmouth · Newquay
This means you could filter your tables by a particular town, or use Cornwall to find all tables relating to services in that county.
To add or remove Tags:
Find Tags at the bottom of the table.
Click the pencil icon next to Tags.
Start typing the Tag you want to add.
Click the green tick to add the Tag.
You can add multiple Tags to the same table.
Adding Table Admins
You can make other users Table Admins, allowing them to manage a particular RBA Table without making them a Portal Admin.
This is useful for delegating responsibility. For example, a Service Manager could manage the RBA Table for their own service without needing administrative access to the whole Portal.
To add a Table Admin:
Click the cog icon next to the table name.
Click Add Admin.
Select the user or users you want to make Table Admins.
Click Add.
Table Admins will see a link to the tables they administer under the Help menu in Multi Me.
A Table Admin can manage the tables they have been assigned, but cannot create new Roles or new RBA Tables. These functions remain with the Portal Admin.
To remove a Table Admin, open the table settings using the cog icon and click the cross next to their name.
TIP: Adding multiple users at once
Once your table has been created, you can add multiple Supported Users, RBA Users and Table Admins without adding them one at a time.
See Editing RBA Tables to learn how to mass add users and make other changes to an existing table.
Was this article helpful?
That’s Great!
Thank you for your feedback
Sorry! We couldn't be helpful
Thank you for your feedback
Feedback sent
We appreciate your effort and will try to fix the article