Once you've created a Goal, you can break it down into smaller, achievable Steps.
For example, if your Goal is Grow Some Tomatoes, your Steps might include preparing the greenhouse, planting seeds and looking after the plants.
You can create as many Steps as you need.
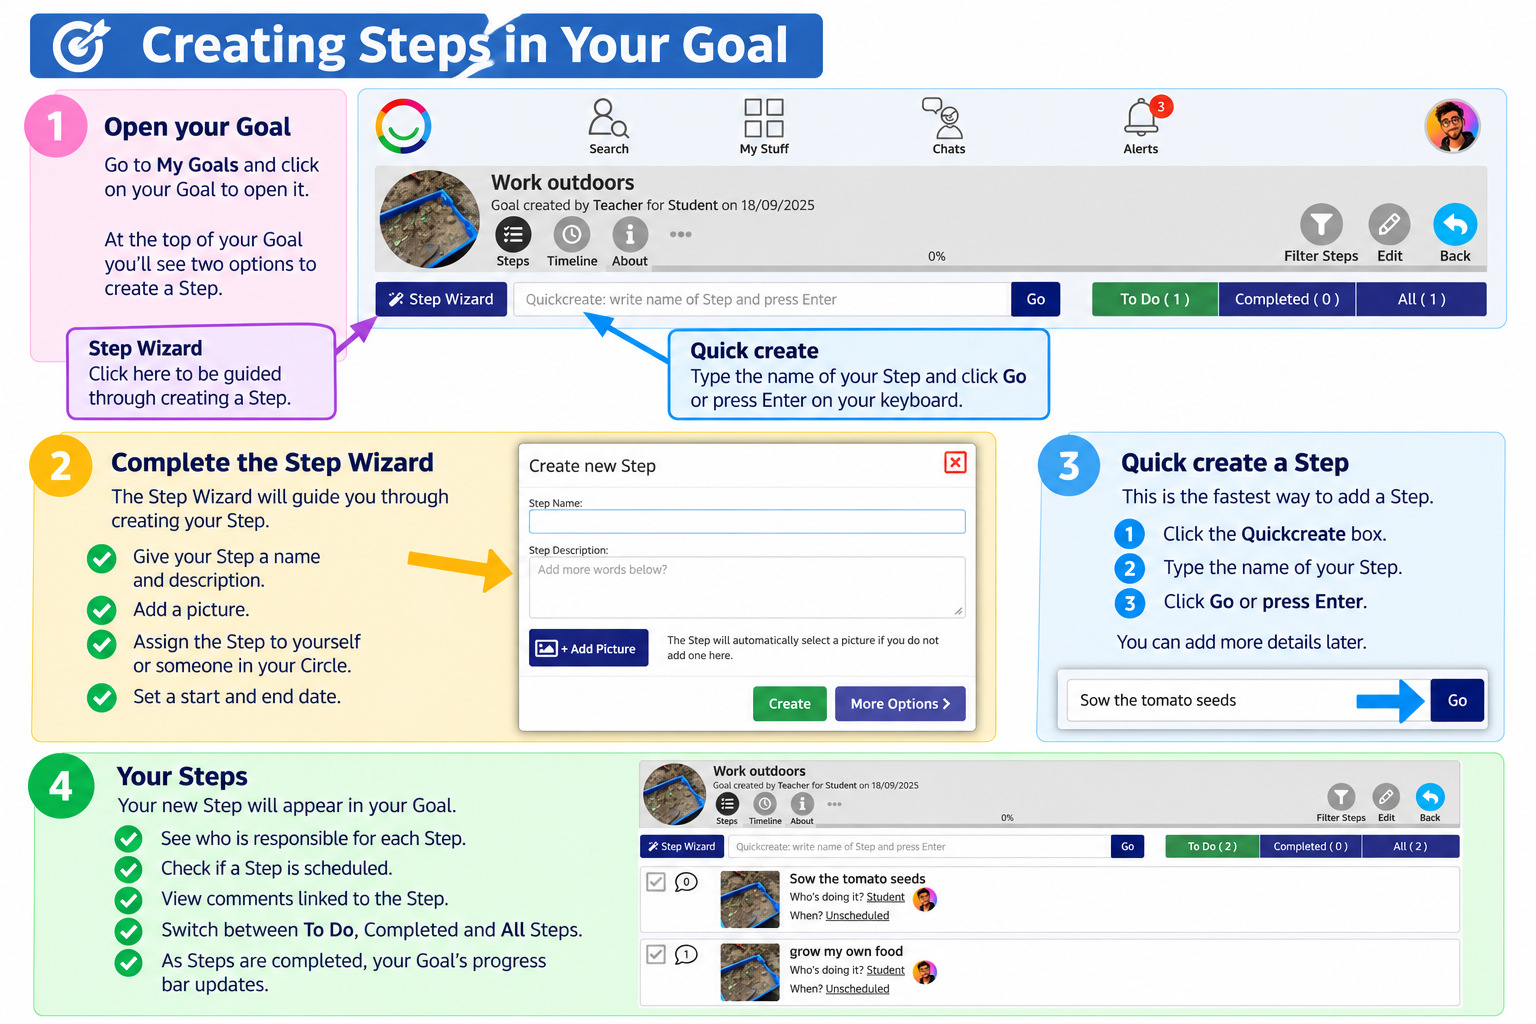
Two ways to create a Step
Open your Goal from the My Goals List Page.
At the top of your Goal, you'll see two options:
Option 1 – Step Wizard
Click Step Wizard to be guided through creating your Step.
The Wizard helps you:
Give your Step a name and description.
Add a picture.
Assign the Step to yourself or someone in your Circle.
Set a start and end date for when the Step should happen.
Follow the instructions to create your Step.
Option 2 – Quick Create
This is the fastest way to add a Step.
Click the Quickcreate text box at the top of your Goal.
Type the name of your Step, such as Sow the tomato seeds.
Click Go or press Enter on your keyboard.
Your new Step will appear in your Goal.
You can add more information later, including a description, picture, who is responsible and start and end dates.
Viewing your Steps
Your Steps appear in a list underneath your Goal.
You can:
Click a Step to open it and see more details.
See who is responsible for each Step.
Check whether a Step has been scheduled.
Switch between To Do, Completed and All Steps.
See comments and updates linked to each Step.
As Steps are completed, your Goal's progress bar updates so you can see how far you've come.
Tip: Try to make each Step small and achievable. Completing Steps along the way helps everyone see and celebrate your progress.
Please note: Your organisation may use a different name for Steps, such as Targets.
Was this article helpful?
That’s Great!
Thank you for your feedback
Sorry! We couldn't be helpful
Thank you for your feedback
Feedback sent
We appreciate your effort and will try to fix the article